Installing Actian Zen/Pervasive PSQL
Before you install Evo-ERP, you must have Actian Zen installed on the server. These instructions are written assuming you are installing Actian Zen Enterprise Server 16, but the instructions will be similar for other versions. For new installations, if you are purchasing Actian Zen from us we provide version 16.
If your server is Linux-based, Actian has some installation instructions available here. Once installed, you can run the Zen Control Center from a Windows workstation to manage the server.
Installation Process
- Download the installer for Zen after logging in to our customer website. If you have not purchased Zen yet, choose Zen 16. If you already own Zen/Pervasive, choose the appropriate installer for the version you purchased.
- Run the installer on your server. If prompted, make sure to choose run as a service instead of run as an application.
Install Zen License
When you first install Zen, you will have a temporary trial license. We recommend installing your full license as soon as possible.
Look in your Start menu for Zen License Administrator and install your Zen license. If you do not yet have a license, you will have a trial license installed by Actian. The license installation requires an Internet connection to complete. If your server can’t reach the Internet and you purchased your license from us, contact us for phone authorization of the license. The license activation for Zen connects the product key with the server.
If you move to a new server, you will need to deauthorize the license on the old server before it can be installed again on the new server.
After Installing
For earlier versions of Pervasive PSQL, Zen Control Center may instead be called PSQL Control Center instead of Zen Control Center. Adapt the following instructions accordingly.
Managing Zen from a Workstation
If you are working directly on your server, skip ahead to the next section. If you are managing Zen from a workstation, you may need to perform some extra steps before proceeding.
- Open the
Zen Control Centeron the workstation. - Right click Engines on the left.
- Choose New
- Choose Server
- Enter the hostname or IP address of the server and click Finish.
- To configure the server you just added, right click it in the list of engines and choose Properties. If you don’t see it in the list, right click Engines again, click Refresh, then check again.
Zen Settings for Evo-ERP
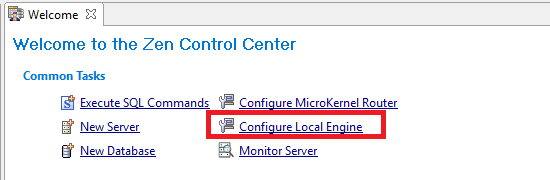
- Open the
Zen Control Centeron the server and choose Configure Local Engine on the welcome screen:
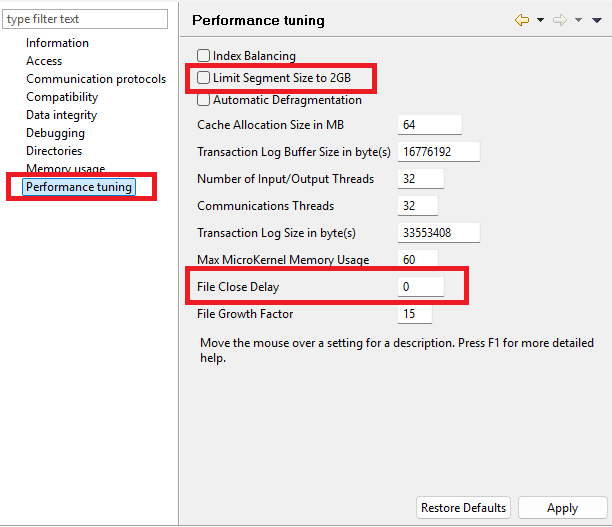
If you are on a workstation, follow the instructions in the section above instead. - Go to Performance Tuning.
- Make sure the setting called Limit Segment Size to 2GB is unchecked.
- Make sure the setting called File Close Delay is set to 0.
- If you made changes, choose Apply and restart the engine if prompted. Note: make sure no one is actively using the database engine while it is being restarted.
This is an example showing the settings that should be changed: